Thursday, October 30, 2014

Positive Negative Space Project

Examples

Look at the examples above and analyze which ones were successful and which ones were not.

Follow the link to see the Rubric

Steps:
  1.  Go to the blog: "What is Positive and Negative space." Read and watch videos
  2. Research Designs : 
    1. Google "positive negative space design" or "positive negative space images"
    2. Or take one of your own photographs and turn it into a pos/neg image
      • Talk to me about this idea if you would like to do this.
      • Could make your project even more personal!
  3. Pick a piece of cardboard from the front of the classroom and put your name on it.
  4. Put newspaper on the table
  5. Paint the cardboard black
    • Only put the paintbrush into the paint 1/2 deep
    • Carefully wipe off excess paint can lip.
    • Put brush on plastic unless you are the last to use then clean it.
  6. Draw 3 to 5 different pencil thumbnail sketches.
    • Your design must be original and not a direct copy to receive an "A"
    • Your design may look somewhat like an image to receive a "B"
    • No direct copying (plagiarism) 
  7. Paint the other side of the cardboard if it bowed (some may be OK)
  8. Put your name on it.
  9. Pick the best thumbnails sketch that that has nice detail and a good balance of positive and negative space. 
  10. ****Experiment with scrap piece of cardboard to see if the cuts you plan will be possible to do and maintain good craftsmanship. If not, come up with another plan.
  11. Lightly draw the design on the cardboard with a 3H pencil.
    • Indicate which areas you are planing to remove with "x" or shading.
  12.  Begin cutting
    • Hold the exacto knife at a slight angle
    • Do not cut in very far.  Just enough to peal the layer back


Sunday, October 26, 2014

Matting an Image

  1. Steps to cutting a mat


  1. Drawing a mat (nothing fancy, just sketch it)


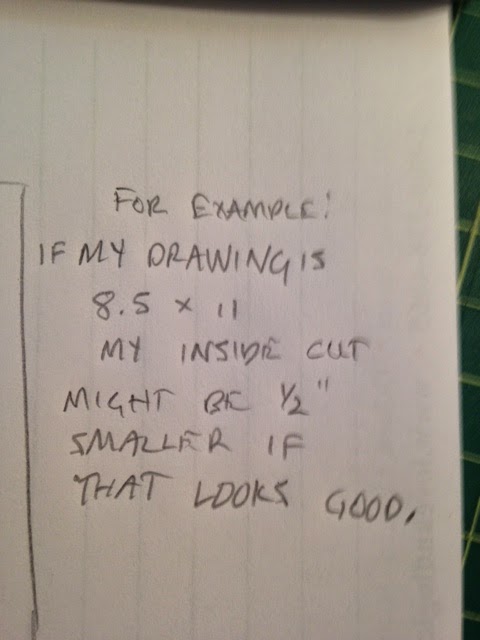
  1. Determine the inside measurement of your mat by one of two ways: either subtracting ½ from each side of your image OR by laying out scraps to see what would look the best. Then write the measurements on your mat sketch.
The inside of your mat must be smaller than your picture or your image will fall right through the opening!

  1. Choose how big your mat width will be (usually 2 to 3 inches looks nice).
  2. Determine the outside measurement of your mat and write it on your mat drawing.
In this example, the outside measurements will by 16.5 " by 14 ".  Yours could be different if your image is a different size!


  1. Cut the outside measurement first

  1. Measure along the sides and mark height and width
  2. If using poster board (cut outside with paper cutter)
  3. If using mat board (cut outside with large mat cutter)


  1. Cut the inside measurement using the mat cutter


  1. Set the measuring bar to the correct distance
  2. Draw the measurement with a pencil
  3. Carefully cut the inside cut, SLOWLY.

SOMETHING EXTRA for Art I Value Portrait assignment:  Language of line mat


Teaching Goal:  Show a beginning understanding of positive negative space by creating an interesting negative space with lines of railboard.  The lines will represent your personality.

  1. In your sketchbook: write down three words that describe your personality. i.e. calm, active, happy, intellectual,
  2. Draw a line that represents that characteristic.
  3. Pick the line you like the best.
  4. Using the back of a canvas panel as protection, cut 5 of the same type of line. The lines should not be thicker than 1/4 ".
  5. Put your cut mat on your portrait and arrange the lines using at least 3 and up to 5 to compliment your portrait and to create an interesting negative space. Get feed back from another student.
  6. Tape the lines into position.
  7. Then tape your portrait onto the mat making sure it fits in the opening.

Monday, October 20, 2014

Oil Painting Lesson


Oil Painting Lesson Steps
      1. Day 1: Transparent underpainting sketch
        1. Do apple study (see blog "underpainting")
      2. Day 2:  Grisaille/ Dead layering opaque
        1. Plan palette knife painting
        2. Look at palette knife images 
          i.  Analyze compositions 
          ii.  Balance, values 
      3. Day 3:  Glaze first layer on apple (15 minutes)
        1. Palette knife underpainting
        2. Use one color and very thin
          1. Work light to dark
          2. Do not mix lay on top
      4. Day 4:  Glaze second layer on apple (15 minutes)
        1. Work on palette knife painting
        2.  Use reference sketch or photo, stay loose
      5. Day 5:  Opaque highlights on apple (15 minutes)
        1. Quick critique
        2. Finish Palette knife painting


Wednesday, October 15, 2014

Underpainting: Oil Painting Apple Study

Watch under painting clips on web site under Cool Links

1. Start an under painting of an apple or something similar
Use Burnt Sienna or Burnt Umber (paint very thinly)


2. The Grisaille/ Deadlayering will neutralize and firm up your composition

3.  Begin Glazing:


Sunday, October 12, 2014

Sketchbook Assignment #1

Black & White Design: Using only simple geometric shapes (circles, squares, rectangles & triangles) and lines create an interesting composition with a focal point (emphasis). Without outlining any shapes use parallel lines to give different values for each shape. Use only horizontal, vertical, or diagonal lines. You can also use Solid black or solid white to fill a shape. Use a ruler & circle templates or Tape roll!! Medium: Sharpies

Steps:  (See photos below)
1.  Draw design in pencil first: Repeat one shape with different sizes
2.  Plan your emphasis.
3.  Begin to fill in with sharpie, create balance.
4.  Remember to use the ruler and trace circles to keep work neat.
5.  Fill entire page with the language of line and shapes.
6.  Think about your negative space
7.  If you make a mistake, make it work in your design
8.  At the end you may chose to put in a few curved lines.

Materials:
Sketchbook or drawing paper
Sharpies (check out)
Circle shapes to trace
Rulers
pencil


Sketchbook Assignment Criteria:
Drawings should fill the ENTIRE sketchbook page. 
  • Include DETAILS (include textures & value, unless otherwise specified.)
  • Spend a minimum of 45 minutes on each assignment.
  • 5 sketchbook assignments are equivalent to one major assignment.

AP Digital Submission Information

Today: Review AP timeline
Have you started your list of images?


Remember:  By the end of the quarter, Oct 20, you should have 5-6 Breadth projects photographed.


Review the following links

It answers questions like...

1. When should you begin uploading images?
2. Photographs of work should be at what resolution?


This link gives more information about digital submissions
Give this a quick review.  We will be using it a lot later.

For Wednesday:  Bring simple object i.e.


  1. fruit
  2. salt shaker
  3. favorite coffee cup
  4. leaf
  5. a tool (wrench)
  6. figurine


Wednesday, October 8, 2014

Cairn Drawings


Think about some of the Elements of Art

 Show form and texture

Use some of the Principals of Art

Contrast and Variety
Make an Emphasis
Show Movement
Think about Negative Space


Works in progress...


2-Design Options and tools for using rocks as inspiration


Emphasis and Movement

The Elements of art: line, shape, value, texture, color and space are organized with principles of art to create Unity.

Two of the principles are Emphasis and Movement:

How did the Impressionist artist Claude Monet use Emphasis and Movement in the Impressions Sunrise?
ArtistClaude Monet
Year1872
TypeOil on canvas
Dimensions48 cm × 63 cm (18.9 in × 24.8 in)
LocationMusée Marmottan Monet, Paris

Friday, October 3, 2014

To Doodle or Not to Doodle

Ted Talk about Doodling

Art I

View artist of the Day  artistaday.com
1.  What does this artist make me think about?
2.  What did this artist do well?
3.  What would I change about this art if it were mine?

AP

1. View artist of the Day
        a.  See above
2.  Discuss Write About Critique
       a.  Talk to me
       b. Think about what you could fix
       c.  Finish
       d.  Get bags and gather rocks for cairn project